Sunday, March 31, 2013

How to change your Profile (Avatar) picture in Blackboard


Blackboard uses a small picture called an "Avatar" to represent you on your Discussion Board posts, in Wikis, Journals, and Blogs.

You may upload an avatar picture as follows:

1.  Click your name at the upper right and select "Settings" from the bottom of the menu:


2. Click "Personal Information"


3.  Click "Personalize My Settings"


4.  Under "Avatar image" click "Use custom avatar image".  Click the "Browse My Computer" button to locate an image on your computer.  After you have selected a file, click "Submit" at the top right.


The best size and shape for the image file is square, 150 pixels by 150 pixels. We recommend resizing and cropping larger images before uploading to Blackboard.  Here is a free web service which you can use to resize your picture:  www.webresizer.com  (here is a video showing how to resize and crop: http://goo.gl/5Sq7bO)

Your Avatar image will be uploaded to Blackboard and used to represent you throughout the application.


Friday, March 01, 2013

How to Add a Banner to your Course


To add a banner to your course in Blackboard:

1.  Log into Blackboard and click to enter your course site.

2.  Click Customization > Teaching Style on the left side.


3. Scroll down to section 7: "Select Banner" and click the "Browse My Computer" button to choose an image file from your computer to be used as a banner.


4.  After choosing the image file, click the "Submit" button at the lower right.


Friday, December 28, 2012

Service Pack 9

Blackboard Service Pack 9 features a new modern look and feel and many feature enhancements and bug fixes.


Some of the new features and enhancements of  Service Pack 9 (which also includes Service Pack 8 enhancements) are:

1.  A new modern look and feel that retains the ease-of-use and placement of features
2.  Quicker course-to-course navigation
3.  Pre-designed course structures and themes to help with your course design
4.  Enhanced grading options, including automatic re-grading of tests/quizzes
5.  Support for the Common Cartridge 1.2 standard
6.  Security and privacy enhancements
7.  An updated Rubric feature
8.  Notifications Dashboard alerts by Text Message (SMS)
9.  Several administrative improvements to enhance the customer support experience

In-depth introductory tutorials are here.  Log in using your Northeastern Blackboard credentials.

Overview:

The new look and feel (video)

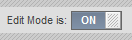
Blackboard is getting an updated look which brings it more in-line with the Web 2.0 experience you've come to expect from a modern application while at the same time retaining the overall placement of features you are used to.  Most noticeable will be the cleaner look which removes the "chevron" editing icons, replacing them with "rollover" editing, meaning that the chevron icons become visible when your mouse cursor hovers over certain areas.  The result is a cleaner, less cluttered, contemporary look and feel.


Course-to-course navigation (video)

You will no longer need to leave the course you are in in order to access your other courses.  Now you can move from course to course from within a course by clicking the drop-down menu in the upper left corner of the page.  Additionally, you can jump to a specific place in the other course.  For example, if you are in the Grade Center of on of your courses, you can easily jump to another course's Grade Center to complete your grading with fewer clicks.


Pre-designed course structures and themes (video)

You can easily change the layout of your course, choosing from a wide variety of pre-built course structures.  Course structures contain course areas, optional sample content, pedagogical information, and instructions to help you design your course easily and efficiently at the beginning of the term.  In addition, course themes provide an a visually engaging course environment. Instructors can apply a variety of themes to their course sites, adding background images to the display and changing the color of the interface including the Course Menu, buttons, and controls. Applying a theme does not affect course content, and the theme can be changed again at any time.


Enhanced grading options

Negative points: the Grade Center will allow for the application of negative point values for wrong answers on test questions. This feature dissuades students from guessing on tests and quizzes by deducting for incorrect answers.

Automated re-grading:  Now you can correct a problematic Test question, and Blackboard will automatically re-grade any student who has already taken the exam, making the necessary correction in the Grade Center.  For any given question, you may drop, give full credit, change a point value, or change the correct answer. After the question has been updated, Blackboard will recalculate the score of all submitted assessments that included the updated question, reflect the update in the Grade Center, and provide notification to both the faculty and optionally to the student for all changes.


Common Cartridge 1.2 support

As of Service Pack 9, Blackboard Learn will support the Common Cartridge 1.2 standard. Common Cartridge 1.2 allows users to export their course content a standard format that can be used in many other LMS environments.


Security and privacy enhancements

Service Pack 9 addresses security fixes for cross-site scripting, link injection, cross-site request forgery, and authorization vulnerabilities.


Rubric enhancement

With Service Pack 9, updated Rubrics include Percentage Range along with Points Range.  The Percentage Range options allows a single rubric to work with any assignment, as the achievement scores are calculated as a percentage of the item being graded.


Text Message (SMS) feature

Allows students to receive course alerts from the courses via SMS on their mobile phones.


Summary and Videos

Blackboard Service Pack 9 also includes all the features of Service Pack 8 and will bring a multitude of improvements.  Here are some additional sources for more information:

1.  Quick video introductions to several new features in Service Pack 9:


2.  Video introduction to Service Pack 8, which is included in the Service Pack 9 update:

http://www.youtube.com/watch?&v=kzKK5vaRkuw


3.  Tutorial: Introduction to the new look and feel


4.  Video introduction to Service Pack 9:

http://www.youtube.com/watch?v=j5QWjTkFUD0


5.  Blackboard's Service Pack 8 information page:

http://www.blackboard.com/sites/sp8


6.  Blackboard's Service Pack 9 information page:

http://blog.blackboard.com/company/featured/enter-blackboard-learn-service-pack-9


7.  In-depth introductory tutorials are here.  Log in using your Northeastern Blackboard credentials.


Wednesday, October 31, 2012

The Difference Between a Running Total and a Non-running Total in the Blackboard Grade Center

The difference between a "running" total and a non-running total is that a running total will not penalize students for ungraded items.

Here is a video showing the difference between a running a non-running Total column in the Blackboard Grade Center, with an example.

Link for full view: http://screencast.com/t/47uOrCzfpA
Unable to display content. Adobe Flash is required.


How to Delete Extra Totals Columns from the Grade Center

You may have duplicate or redundant "Total" or "Weighted Total" columns in your Blackboard Grade Center.

Here is a short video explaining how to remove them.

Link for full view: http://screencast.com/t/gVWMp3HaM7N
Unable to display content. Adobe Flash is required.


How to Post a Video in Blackboard Outside of Your Course

Here is a method that can be used to post content in Blackboard, such as a video file, outside of the context of a specific Blackboard course site.

Link to full view: http://screencast.com/t/wtyivHjj
Unable to display content. Adobe Flash is required.


For this method we recommend using "web-optimized" .MP4 files so that they will playback smoothly.

To convert your video files to web-optimized .mp4 format, try the Handbrake video converter.  Here is a picture of the correct settings to use for Handbrake:  http://screencast.com/t/M9ukbpwo


Wednesday, September 05, 2012

How to Post a Link to an RSS Feed into your Blackboard Course

Here is a video showing how to post a link to an RSS feed into your Blackboard course site.

Link to video: http://screencast.com/t/axcmR5FZw8
Unable to display content. Adobe Flash is required.


Friday, July 13, 2012

How to Post a Google Docs link into your Blackboard Course

To use Google Docs within Blackboard, create a Google Doc and then post a link to it in your Blackboard course.  You may also choose to embed a copy of the document as a preview for students.

The first time each student clicks the link to edit the document, the owner of the Google Doc will receive an email requesting access.  You may click the link in the email to grant the student access to edit.

Here is a video demonstrating the process.  This video has audio.

(direct link to video http://screencast.com/t/N7ZHgTELbk)
Unable to display content. Adobe Flash is required.


Thursday, July 05, 2012

Blackboard Mobile

Now available at Northeastern University for everyone


The Blackboard Mobile Learn App allows students and instructors to access Blackboard while on the go by giving students and educators access to their courses, content and organizations over both WiFi and 3G/4G on a variety of mobile devices including Android, iPhone, iPod touch, iPad, and BlackBerry.
Blackboard Mobile Learn offers features for easy viewing of Blackboard content on mobile devices. Some features include: viewing and posting announcements, discussions, blogs, tasks, view roster, and journals.
Blackboard Mobile Learn also supports playing embedded media such as videos and music from a course’s Blackboard site.
Students can also view grades for assignments on mobile devices using Blackboard Mobile Learn.
Student Features:
  • View selected course content for your available courses
  • View Announcements, Tasks, Class Roster, Grades, and some types of embedded media.
  • Participate in Discussion Board forums, Blogs, and Journals
  • Comment on classmates’ blogs and journals.

Instructor Features:
  • Create and view Announcements.
  • Create and view Discussion Board threads.
  • Post comments on students’ Blogs and Journals.
  • View Tasks, Class Roster, and embedded media.
To use Blackboard Mobile, start by downloading the app for your device:

Click here, then download the application for your platform.


After you have installed the application, launch it and search for "Northeastern" in the list of schools.


Monday, February 13, 2012

How to Create an iTunes U Site for your Blackboard Course

You can create a "private" iTunes U page for your Blackboard course.  You can use the site to upload media files for your course.  Your students can subscribe to your course's iTunes U site using the Apple iTunes client on their computer (Mac or PC), or their iOS devices (iPad, iPod, iPhone).  Once a student has subscribed to your iTunes U site, any content you subsequently add will be automatically downloaded for that student.

Adding an iTunes U site to your Blackboard course is a 3-step process.  Here are videos demonstrating how to perform each step in your course.

1.  Enable iTunes U for your Course.

Video has audio, please enable sound. Please click here for video instructions.

2.  Post a link in your Blackboard course that students can use to access the iTunes U site

Video has audio, please enable sound.  Please click here for video instructions.


3.  Upload and manage content (media files) in your iTunes U site

Video has audio, please enable sound.  Please click here for video instructions.

When uploading files to iTunes U, you may select one file at a time.  You may repeat the select as many times as necessary to queue the remaining files for upload.  Here is a video demonstrating how to upload multiple files.

To remove content that you have added to your private iTunes U site, use the "Delete" option from the "Choose Action" drop-down.  Here is a video showing how to delete content.


More information:

For information regarding recommended file formats for iTunes U, audience/access questions, questions regarding Copyright, and other questions, please see our Blackboard iTunes U site FAQ here.


.


Wednesday, February 01, 2012

iTunes U Content in Blackboard - FAQ

Here are some frequently asked questions about iTunes U content in Blackboard.

How do I publish content to iTunes U?

To publish content to your students in your Blackboard course, please see this article.  Content published to iTunes U via Blackboard is not public; it is only available to the students enrolled in your course*.  This is known as a "private" iTunes U page.

To publish content on Northeastern University's public iTunes U site, see this page.


Who has access to the content published in iTunes U?

The content published to your course-based "private" iTunes U site is available only to the students enrolled in your in your course in Blackboard.  Students access the material by using the link that you post in your Blackboard course.  See this article for instructions.


Can I post copyrighted material in my private iTunes U site?

Material posted to the a private iTunes U site is subject to the provisions of copyright law and the TEACH act.  Please see policies pertaining to patent and copyright in the Northeastern University Faculty handbook.  Apple's copyright overview is here.


Can I restrict access to material posted on iTunes U?

*Only students enrolled in your course have access to the link to your private iTunes U site in Blackboard.  It is technically possible for a student to distribute this link intentionally to another person outside of your Blackboard site.  Also, the iTunes U service is a subscription download service (not a streaming video service) - media files posted to iTunes U are automatically downloaded to the computers of the students using the service.  For these reasons, if you have material that is particularly sensitive to redistribution, you may want to post it via another method, such as an online streaming video service that has a 'no-download' option (e.g. services such as Youtube or Vimeo).


What are the file formats supported in iTunes?

Here is a link to Apple's recommended file format information for iTunes U.

If you need to convert from another video format to an iTunes U-supported video format, we recommend using the Handbrake converter, available for free download here: http://handbrake.fr/


Whom can I contact if I have another question?

Please contact the NU Service Desk at 617.373.4357 or help@neu.edu.  Questions regarding the public iTunes U site may be directed to itunes@neu.edu.


Tuesday, November 15, 2011

Blackboard Email and Blackboard Messages

Blackboard has two separate messaging systems: (1) an internal messaging system called "Course Messages", and (2) an external messaging system called "Email".
 

If you use Tools > Course Messages or Course Tools > Course Messages, then the messages you send stay within Blackboard. You can send and receive Messages, and the students can check their messages and reply within Blackboard using Tools > Course Messages. You will find folders in Messages similar to the ones you would see in an email client (Inbox, Sent). 


If you use Tools > Send Email or Course Tools > Send Email function in Blackboard, then the email will go out of Blackboard and into the Internet email system (to the students' email). Email is external to Blackboard, so when students reply, their replies will go to your email inbox (Outlook, Northeastern webmail, Lotus Notes, Gmail, Yahoo, Hotmail, etc.). Email replies will not be sent back into Blackboard.  Email delivery via the Internet may not be instantaneous.  In the event of delay, the Internet will try to re-send messages for several days until it is delivered.


The Email and Messages functions in Blackboard are separate (messages do not travel between them). This means that if you send an "Email" from Blackboard using the Email function, it is not retained inside Blackboard anywhere. If you send a "Message", it does not go outside of Blackboard.


We hope this clarifies the Blackboard messaging system. Thanks for using Blackboard!


.

Friday, October 07, 2011

How to Allow One Student More Time on a Timed Test/Quiz in Blackboard

You may want to allow a student to take longer than the time limit for a timed Test or Quiz in your Blackboard course.

To accomplish this, set a time limit for the test for everyone, and then use the "Test Availability Exceptions" section of the Test Options to add a timer exception for a particular student.


Step 1:  Add the user for whom you want to make an exception--


Step 2:  Set the timer--


About the "Auto Submit" option

When you set a time limit for a test, the "Auto Submit" option forces the test to submit when time runs out.  This is typically a good idea, but if you have some students in the class who may need more time, you may want to leave the "Auto Submit" is set to off.  This will allow a student to submit a test past the time limit, but will give you as the instructor the option to penalize the student's grade for the overtime.

If a student submits the test past the time limit, instead of auto-grading the test, Blackboard will instead put an exclamation mark in the Grade Center for that student where the grade would normally be.


Click the "drop-down arrow" in the cell to view the attempt.


Click the "Test Information" link. Blackboard will report how many minutes over the time limit the student submitted the test.


This gives the instructor an opportunity to change the grade based on the time the student went over. Some instructors choose to deduct one point per minute over, or similar scheme.


Making a test available for just one student

A similar problem is the case that you want to go back and make a previous Test / Quiz available to just one student to take over again. To do so, make the test link available for all students, but set the date restrictions so the students cannot access the test:


Then go back and use the "Test Availabilty Exceptions" section to make the test available for a range of dates that includes the present, just the student you want to take it:


Now no one can access the test except for the one student you want to take it.

You may also modify the test options for that test to include requiring a password to access it. Then set the test to available again for everyone, and only give the one student the password (more detailed instructions for how to do this are here).


We hope this information is helpful.
.

Tuesday, October 04, 2011

How to Add a Textbook to your Course in Blackboard

There are several ways to add a link to your textbook in Blackboard.  Here is a way that automatically creates a link to the Northeastern University bookstore.

1.  Enter your course site in Blackboard and make sure Edit Mode is set to ON at the top-right so you can add content to your course.


2.  Make sure the Textbook tool is turned on in your course by clicking Customization > Tool Availability on the left and making sure the boxes are checked for the Barnes and Noble Textbook tool.


3.  Click the "Tools" section in the Course Menu on the left.


4.  Click the "Barnes and Noble Textbook Tool"


5.  Use the drop-down to search for your textbook by Title, Author, or ISBN number.  Type your search text in the Keyword field and click the "Go" button.


6.  Locate your book and click the "Select" button.


7.  The book is now added to your course.  The students can access the book by navigating to Tools > Textbooks List.


Saturday, October 01, 2011

Blackboard Service Pack 7

Service Pack 7 for Blackboard includes bug fixes and improvements. Some of the features enabled by this Service Pack are:


- Interactive Rubrics (rubrics sharing) to enable consistent and fair grading for students
- Automatic Test/Quiz submission for a timed assessment when time is up
- Course Files permissions adhere to content availability settings (security improvement)
- Support for the "Common Cartridge 1.1" standard for exporting and importing course content
- Improved McGraw-Hill content integration
- Grade Center improvements, improvement to "Needs Grading" feature
- Improved tutorials for educators
- SCORM content player improvements
- Site performance improvements


Please see Blackboard's own site which details some of the changes in this Service Pack:


For more information, please contact the Help Desk at 617.373.HELP (x4357)

.

Monday, September 12, 2011

How to Create a Sign-Up Sheet in Blackboard using Google Calendar

UPDATE:  Google Calendar has discontinued its sign-up block function.  The new way to do this in Blackboard is here: http://blackboardtips.blogspot.com/2013/11/how-to-use-sign-up-tool-in-blackboard.html

The following post is outdated
_________

You may want to create a sign-up sheet for Office Hours in your Blackboard course.

Here's how to do it using Google Calendar in a way that is convenient for students to use.


Unable to display content. Adobe Flash is required.


Note: To sign up for an office hours slot, students must have a Google Account (this is how the Office Hours calendar knows the names of the students in the slots without having to have them explicitly type their names). All students at Northeastern University already have Google Accounts via the G-Apps service (more information on G-Apps is here).

How to Change the Entry Point for your Blackboard Course

The Entry Point is the first page students see when they click into your course site.

Here's a video showing how to change to Entry Point to a different Content Area:


Unable to display content. Adobe Flash is required.

Thursday, August 18, 2011

How to Upload Many Files and Folders to Blackboard At Once

If you have a lot of files and folders and you want to upload all of them to Blackboard at once, you can use a "Document Package".

A Document Package is a .zip file containing a structure of folders and files to be uploaded.

When you add a Document Package to a content area in your course, the folder structure and contents of the zip file will be uploaded to your course site in Blackboard and unpackaged into separate files and folders, preserving the folder hierarchy contained in the .zip file.


You can add a Document Package to a content area in Blackboard as follows:

1. Create a .zip file on your computer containing the files and folders you want to upload to Blackboard. If your zip file contains folders as well as files, make sure you use the "preserve folder information" option when creating your .zip file.

2. Log on to Blackboard and enter your course.

3. Make sure Edit Mode is on so you can add content to your course.


4. Click into the content area into which you want to upload the contents of your .zip file (e.g. the "Course Materials" section).

5. Select "Document Package" from the "Build Content" button.


6. Click the Browse button, browse to the .zip file you have prepared, and click Open.

7. Choose options and click the Submit button.


The file's complete contents will be uploaded to your Blackboard course and unpackaged to separate items in the Content Area you selected.


.

Saturday, July 16, 2011

How Do Students Get Enrolled Courses in Blackboard?

Here is how students gain access to course sites on the NEU Blackboard site at blackboard.neu.edu


Northeastern University students are enrolled automatically in course sites in Blackboard based on their enrollments in the Northeastern University Registrar's system, which is known as "Banner".

Students register for courses on the myNEU portal at myneu.neu.edu (CPS/NU Online students may register here)

If you have not activated your myNEU account yet, click the "How do I get a myNEU username and password?" link on the myNEU site. You choose your password during the activation process.

To Register for courses log into the myNEU site and click the "Self Service" tab:


Then click the "Course Registration" link:


Adding Courses
The Blackboard site automatically enrolls students in courses from the Registrar within 2 hours of official registration. However, only courses for which the instructor has made the course site available in Blackboard will appear for students in Blackboard. If the instructor does not use Blackboard for his/her course, students will not see the course site in Blackboard. Students: if you have a course which you believe should be available, please contact your instructor, who can make the Blackboard course site available to you and the other students enrolled in the course.
Dropping Courses

To drop a course, use the "My Schedule" link on the Self-Service tab on the myNEU site. Any course you drop via the myNEU portal / Registrar's Office will be removed from the Blackboard site within 2 hours.


To see a complete list of your registered courses at any time, use the "My Schedule" link on the Self-Service tab on the myNEU site.

CPS / NU Online students: if you have CPS / NUOL courses, they will be found on the NU Online Blackboard site at nuonline.neu.edu. The NU Online site operates independently of the NEU Blackboard site, however updates to the NU Online site from the Registrar's office happen at a similar interval.


Instructors:  If you are an instructor of a Blackboard course and are interested in adding someone to your course, please see this article.


For support for NEU Blackboard, please contact the Help Desk at 617.373.4357 or help@neu.edu.

For support for NU Online Blackboard, please contact the 24/7 NU Online Support Desk at 855-836-3520.


.


Thursday, July 14, 2011

Connect Blackboard to McGraw-Hill Connect

This is how to connect your Blackboard course to the McGraw-Hill Connect service.

1.  If you have not done so already, establish a McGraw-Hill Connect account at http://connect.mcgraw-hill.com

2.  Go to Blackboard and navigate to your course site.

3.  Click the "Tools" area on the left side of your course (if you do not have a Tools area, click here to see how to create one):


4.  Click the McGraw-Hill "Higher Education" link:


5.  Click the "Pair Course with a Connect Section" link:


6.  Follow the instructions that appear on McGraw-Hill's site to finish linking to your course.

7.  After your course is linked, McGraw-Hill content may be added to your course using these buttons (click play button):

(video link: http://screencast.com/t/oLwU5CBnD877)
Unable to display content. Adobe Flash is required.
 Build Content >> McGraw-Hill Library
Create Assessment >> McGraw-Hill Assignment
Assign Textbook >> McGraw-Hill Create

.


Tuesday, June 21, 2011

How to use Respondus Lockdown Browser for a Test in Blackboard

Respondus LockDown Browser is a tool that locks down the testing environment within Blackboard to prevent students from browsing to other sites during an exam.  There is more information on the features of LockDown Browser here:  http://www.respondus.com/products/lockdown.shtml


To require the use of Respondus Lockdown Browser for an existing Test in your Blackboard course:

1.  First make sure you have created a Test under Course Tools > Tests, Surveys, and Pools.  After you have an existing Test in place, you can require the students to have Lockdown Browser in order to take the test.

2.  Click the Course Tools > Respondus Lockdown Browser link on the left side of your course.


3.  Locate the Test you want to lock down, click the drop-down menu icon to the left of the test name, then select "Modify Settings"


4.  Select "Require Respondus LockDown Browser for this exam".  You may optionally require a password that the students will need to know in order to take the test (you must distribute the password to the students via your preferred method).


Click Save and Close (on the right)


5.  In order to take the test, the students will first need to download and install the Respondus Lockdown Browser client on their computers.  Students may download the client via this link:


After downloading and installing the LockDown Browser client, students should navigate to your exam in Blackboard and click on the link to take the test as they normally would.


For more information:

Click for Instructor Quickstart Guide

Click for Student Quickstart Guide


.