Click here to view the recommended browsers for use with our version of Blackboard.
Saturday, March 19, 2011
Monday, March 07, 2011
Student Home Pages in Blackboard
Older versions of Blackboard (versions 7.x and previous) had a "Home Page" tool where students could post some information about themselves including a picture for the instructor and other students.
The newer version of Blackboard (9.x +) has retired the "Home Page" tool. Instructors can now use the "Blog" tool to achieve a similar result. To create a place for students to post information about themselves, the instructor can make a Blog, and all students can post some information about themselves on it.
Below there is a link to a video that shows three things:
1. Creating a Content area on the left called "Home Pages" (this is optional; you can put the Blog into any section of your course)
2. Creating a Blog called "Home Page" to simulate the title of the previous feature
3. After turning Edit Mode off at the top right, the video shows how a student would access the blog and post something about him/herself.
The students can upload pictures of themselves using the "Avatar" feature under "Personal Information". Please see this page for instructions for how to upload an avatar/profile picture to Blackboard. This should be noted in the "Home Page" Blog instructions (see the video), so students will know how to do it.
We hope this information is helpful for you and your students.
Wednesday, February 23, 2011
How to add Pictures to Test Questions in Blackboard
You can add pictures to your online test questions in Blackboard.
To do so, go to the Test Manager and edit or create a test. Enable the pictures in questions option under "Creation Settings". Then create a question and browse to your computer to find the image to add.
The image must be appropriately sized, as Blackboard will not automatically resize the image. We recommend using images no more than 640 pixels wide.
Here is a video demonstrating how to add pictures/photos to online tests in Blackboard 9.
This video has audio, so please turn on the sound on your computer:
Tuesday, February 15, 2011
Uploading Grades to the Grade Center from a File
Uploading Grades from External Sources
Instructors can perform off-line grading in an application like Microsoft Excel and then upload grades into the Blackboard Grade Center from a file. Instructors can upload grades from a Comma-separated Value (.csv) file or a Tab-delimited (.txt) file. The data in the file must be formatted in a specific way to upload correctly to the Grade Center.
Formatting External Files for Uploading
To match the data in the file to existing with Grade Center data, unique identifiers are necessary for each Student and for each column in the file. The unique identifier used for each Student is the Student's Username. The unique identifier for each column is a Column ID number. Column ID numbers are generated by Blackboard and appear in the "Quick Column Information" option in the column header drop-down menu for each column in the Grade Center. Columns in the file you intend to upload should match the column IDs in the Grade Center. Columns in the file that do not have Column ID numbers will create new columns in the Grade Center.
Each data file uploaded to the Grade Center requires a header row with one record per subsequent line. The format of the data file uploaded to the Grade Center is determined by the type of delimiter that is used to parse the data into separate columns. Data files can be tab delimited with a file extension of .txt, or comma delimited with a file extension of .csv. Files with the extension of .xls or .xlsx are generally Excel-formatted files which cannot be uploaded to Blackboard directly.
Tip: Before uploading your file, open it in a text editor such as Notepad, Wordpad, or TextEdit in order to confirm that the file contains readable text and not binary Excel-formatted data which looks unreadable when opened in a simple text editor.
Format Details:
Data in each column of comma-delimited files must be contained within straight quotation marks ( " " ). Data in each column of tab-delimited files does not require a quote character.
Tip: Blackboard recommends using tab-delimited files for uploading onto the Grade Center to avoid having to use quote characters and because tab-delimited files often open more elegantly in Microsoft Excel.
In the sample files below, columns that already exist in the Grade Center have a Column ID number as part of the column name. The column Attendance does not have a Column ID so it will be created as a new column in the Grade Center. There is also no corresponding data for the new column, represented by a double set of quotation marks in the .csv file. Entries for attendance can be added manually from the Grade Center, or can be uploaded from another file.
Tab Delimited .txt File Sample:
Comma Delimited .csv File Sample:
"User Name","Last Name","First Name","Homework|188","Mid-term|189","Project|190","Final|191","Attendance"
"aanchor","Anchor',"Anne","10","25","25","25",""
"bbutterworth","Butterworth","Bob","7","20","12","24",""
"ccharter","Chuck","Charter","3","20","23","22",""
"ddoong","Dan","Doong","9","15","17","19",""
Uploading the File to the Grade Center
To upload a file to the Grade Center, follow these steps:
1. Click the Work Offline option on the right side of the Grade Center page, and click Upload.
2. Click Browse to search for the file.
3. Select the Delimiter Type: Comma, Tab, or Auto. Auto will attempt to automatically detect the delimiter used in the selected file.
4. Click Submit to upload the selected file.
5. Review the list of data from the file to be uploaded. Use the check boxes to de-select any data to be excluded from the upload. Using this method, it is possible to upload only the desired columns of data from the file.
6. Review the Data Preview Column to ensure the correct data is being uploaded. Data that appears incorrect can denote an improperly formatted file. The Data Preview will only show a sample of the data in each column in the file.
Note: Large files take significant time to process and a warning message will be displayed for any files that need extra time to process. To avoid long processing times, break up large files into separate uploads.
7. Click Submit to confirm and upload the file.
Information about uploading "Letter Grades" to Blackboard:
The grades in a Grade Center upload file may be numeric or "letter" grades with the following caveats:
1. Blackboard accepts letter grades only in upper case (e.g. "A, B, C" not "a, b, c"). If the grades in the upload file are in lower case, Blackboard will reject them.
2. When uploading Letter grades to an existing Grade Center column, the existing Grade Center column must be set to Display "Letter" grades.

If you try to upload letter grades to a column which is currently set to display numbers or percentages, Blackboard will reject the letter grades and leave the column unchanged.
Instructors can perform off-line grading in an application like Microsoft Excel and then upload grades into the Blackboard Grade Center from a file. Instructors can upload grades from a Comma-separated Value (.csv) file or a Tab-delimited (.txt) file. The data in the file must be formatted in a specific way to upload correctly to the Grade Center.
Formatting External Files for Uploading
To match the data in the file to existing with Grade Center data, unique identifiers are necessary for each Student and for each column in the file. The unique identifier used for each Student is the Student's Username. The unique identifier for each column is a Column ID number. Column ID numbers are generated by Blackboard and appear in the "Quick Column Information" option in the column header drop-down menu for each column in the Grade Center. Columns in the file you intend to upload should match the column IDs in the Grade Center. Columns in the file that do not have Column ID numbers will create new columns in the Grade Center.
Each data file uploaded to the Grade Center requires a header row with one record per subsequent line. The format of the data file uploaded to the Grade Center is determined by the type of delimiter that is used to parse the data into separate columns. Data files can be tab delimited with a file extension of .txt, or comma delimited with a file extension of .csv. Files with the extension of .xls or .xlsx are generally Excel-formatted files which cannot be uploaded to Blackboard directly.
Tip: Before uploading your file, open it in a text editor such as Notepad, Wordpad, or TextEdit in order to confirm that the file contains readable text and not binary Excel-formatted data which looks unreadable when opened in a simple text editor.
Format Details:
Data in each column of comma-delimited files must be contained within straight quotation marks ( " " ). Data in each column of tab-delimited files does not require a quote character.
Important Tip: To obtain a file that is formatted correctly for uploading, first download full Grade Center file and open it in a text editor or spreadsheet application. Existing columns will have Column ID numbers that must be included in future uploads. For instructions on how to download the Grade Center see Downloading Grades from the Grade Center.
Tip: Blackboard recommends using tab-delimited files for uploading onto the Grade Center to avoid having to use quote characters and because tab-delimited files often open more elegantly in Microsoft Excel.
In the sample files below, columns that already exist in the Grade Center have a Column ID number as part of the column name. The column Attendance does not have a Column ID so it will be created as a new column in the Grade Center. There is also no corresponding data for the new column, represented by a double set of quotation marks in the .csv file. Entries for attendance can be added manually from the Grade Center, or can be uploaded from another file.
Tab Delimited .txt File Sample:
User Name Last Name First Name Homework|188 Project|190 Final|191 Attendance
Aanchor Anchor Anne 10 25 5
Bbutterworth Butterworth Bob 7 20 12
Ccharter Charter Chuck 3 23 2
Ddoong Doong Dan 9 17 19
Aanchor Anchor Anne 10 25 5
Bbutterworth Butterworth Bob 7 20 12
Ccharter Charter Chuck 3 23 2
Ddoong Doong Dan 9 17 19
Comma Delimited .csv File Sample:
"User Name","Last Name","First Name","Homework|188","Mid-term|189","Project|190","Final|191","Attendance"
"aanchor","Anchor',"Anne","10","25","25","25",""
"bbutterworth","Butterworth","Bob","7","20","12","24",""
"ccharter","Chuck","Charter","3","20","23","22",""
"ddoong","Dan","Doong","9","15","17","19",""
Uploading the File to the Grade Center
To upload a file to the Grade Center, follow these steps:
1. Click the Work Offline option on the right side of the Grade Center page, and click Upload.
2. Click Browse to search for the file.
3. Select the Delimiter Type: Comma, Tab, or Auto. Auto will attempt to automatically detect the delimiter used in the selected file.
4. Click Submit to upload the selected file.
5. Review the list of data from the file to be uploaded. Use the check boxes to de-select any data to be excluded from the upload. Using this method, it is possible to upload only the desired columns of data from the file.
6. Review the Data Preview Column to ensure the correct data is being uploaded. Data that appears incorrect can denote an improperly formatted file. The Data Preview will only show a sample of the data in each column in the file.
Note: Large files take significant time to process and a warning message will be displayed for any files that need extra time to process. To avoid long processing times, break up large files into separate uploads.
7. Click Submit to confirm and upload the file.
Information about uploading "Letter Grades" to Blackboard:
The grades in a Grade Center upload file may be numeric or "letter" grades with the following caveats:
1. Blackboard accepts letter grades only in upper case (e.g. "A, B, C" not "a, b, c"). If the grades in the upload file are in lower case, Blackboard will reject them.
2. When uploading Letter grades to an existing Grade Center column, the existing Grade Center column must be set to Display "Letter" grades.
If you try to upload letter grades to a column which is currently set to display numbers or percentages, Blackboard will reject the letter grades and leave the column unchanged.
Tuesday, February 08, 2011
How to Upload Many Pictures to Blackboard at Once
This page describes a method for uploading a .zip file containing picture files. If you would like to upload a collection of a combination of different kinds of files and folders (including picture files) all at once to Blackboard, please also see How To Upload Many Files and Folders to Blackboard at Once.
You can upload many pictures to your Blackboard course site at one time by using the a "package file" - a .zip file on your computer which contains the pictures which Blackboard can "unzip" for you.
Direct link to video: http://screencast.com/t/jz1HeludO
(there is audio in this video so make sure your sound is enabled)
Friday, January 21, 2011
A Quicker Way to Add Users to Groups in Blackboard
One way to speed adding students to Groups in Blackboard is to use the letters on your keyboard to scroll down to the person whom you want to enroll.
Here is a demonstration video:
(this video has audio, so turn on your computer's sound):
We hope this tip is helpful.
Here is a demonstration video:
(this video has audio, so turn on your computer's sound):
We hope this tip is helpful.
Friday, December 03, 2010
Using Groups in Blackboard
Groups are used in Blackboard to divide your class into individual groups to facilitate group communication and interaction.

4. In the "Group Name" box, enter the name of the group and an optional description:

5. Check the group options you want to make available to the Group:

8. If later you want to go back to a group a edit the membership or add more students, click the >> Edit option to the right of the group name in your Groups list:

Common Uses for Groups:
- Group Discussion Boards
- Group Chat using the Virtual Classroom feature
- Group File Exchange
- Group Email
- Group Blogs, Journals, and Wikis
- Group Assignments
- Limiting access to posted items or folders to certain Groups of people using the Blackboard Adaptive Release function.
How to create a Group
1. In your course, toggle Edit Mode at the top right to "On".

2. At the bottom left, click "Groups" under "Users and Groups"
3. Click the "Create Single Group" button > Manual Enroll option to create a manually-populated group.
2. At the bottom left, click "Groups" under "Users and Groups"
3. Click the "Create Single Group" button > Manual Enroll option to create a manually-populated group.
4. In the "Group Name" box, enter the name of the group and an optional description:

5. Check the group options you want to make available to the Group:

6. Next, add users (students) to your group. To do this use the "membership" section to move students from the left box to the right box:


7. Once you have decided on the membership, click the "Submit" button at the bottom.
8. If later you want to go back to a group a edit the membership or add more students, click the >> Edit option to the right of the group name in your Groups list:

How Students access the Group
To access their group pages, students click the "Groups" link in the Course Menu on the left side of the course.
Students are only able to access Groups of which they are members.
To access their group pages, students click the "Groups" link in the Course Menu on the left side of the course.
Students are only able to access Groups of which they are members.
Saturday, October 09, 2010
How to Make a Test/Quiz available Again For Just One Student
Your students have already finished a Test/Quiz, but you want to make the Test available again for just one student for a make-up.
The easiest way to make a quiz available to just one student is to set a password on the quiz and give it only to that one student, as follows:
1. Make sure the student doesn't already have a grade or a lock for the Test/Quiz in the Grade Center. If so, clear the grade/in-progress indicator/attempt so the cell is empty.
2. Go to the Content Area where the link to the Test/Quiz was deployed. Click the drop-down arrow to the right of the test link, then click "Edit the Test Options".
3. Make the quiz available in the usual way using "Make the link available" = "Yes".
4. Remove any date restrictions on the Test link by checking the "Display After" date is in the past and the "Display Until" date is in the future.
5. Scroll down to "Password. Require a password to access this Test." Check the box, invent a password and type it in the box.
6. Click Submit at the bottom.
There are ways to give a particular student more time on a test, or to hide the test for all students except for a particular student, by using the "Test Availability Exceptions" option in the Test Options. More information on Test Availability Exceptions here.
The easiest way to make a quiz available to just one student is to set a password on the quiz and give it only to that one student, as follows:
1. Make sure the student doesn't already have a grade or a lock for the Test/Quiz in the Grade Center. If so, clear the grade/in-progress indicator/attempt so the cell is empty.
2. Go to the Content Area where the link to the Test/Quiz was deployed. Click the drop-down arrow to the right of the test link, then click "Edit the Test Options".
3. Make the quiz available in the usual way using "Make the link available" = "Yes".
4. Remove any date restrictions on the Test link by checking the "Display After" date is in the past and the "Display Until" date is in the future.
5. Scroll down to "Password. Require a password to access this Test." Check the box, invent a password and type it in the box.
6. Click Submit at the bottom.
The test is now available, but requires a password to take.
7. Give the password you invented to the one student so only that student will be able to enter the quiz again, verbally or via Email / Message.
Once the student takes the make-up Test/Quiz, you can confirm the grade in the Grade Center and then make Test link unavailable again.
7. Give the password you invented to the one student so only that student will be able to enter the quiz again, verbally or via Email / Message.
Once the student takes the make-up Test/Quiz, you can confirm the grade in the Grade Center and then make Test link unavailable again.
There are ways to give a particular student more time on a test, or to hide the test for all students except for a particular student, by using the "Test Availability Exceptions" option in the Test Options. More information on Test Availability Exceptions here.
We hope this information is helpful.
.
Tuesday, February 23, 2010
Pasting from Microsoft Word into Blackboard
Instructors and students have experienced problems viewing text that has been pasted into Blackboard directly from external applications such as Microsoft Word or other Office products.
The symptoms include text becoming unviewable/uneditable, errors in the Discussion Board, corruption of Test/Survey questions, extra/strangely formatted text/unusual symbols.
The cause of this issue is hidden formatting code that is included when using the copy/paste feature from Microsoft Office products. This "bad HTML code" must be removed prior to pasting into Blackboard.
Here's how to prevent this:
Use the following procedure to prevent issues when pasting Text into Blackboard:
1. In your external application (such as Microsoft Word), highlight the desired text and copy it.
2. Open Notepad (PC: Start > All Programs> Accessories > Notepad) or TextEdit (Mac) and paste your text into the text editor. This action will remove the formatting codes.
3. In your text editor, highlight the entire block of text again (or push CTRL+A on the keyboard to select all) and then copy it again.
4. Go to the your course in Blackboard and paste the text into your desired location.
5. Format your text again using Blackboard’s own Text Box Editor functions in the first two rows of the Toolbar (e.g. Bold, Italics, Underline, etc).
Using this process of "cleaning" your clipboard text of external formatting takes longer but it is very helpful in preventing issues that may occur.
We hope this information is helpful.
Tuesday, December 15, 2009
How to Embed a Vimeo Video in Blackboard
You may want to post a video in your Blackboard course using the Vimeo.com streaming service for several reasons, including:
1. You can post much longer videos using files that may normally be too large to upload to Blackboard successfully.
2. You can password protect your video and prevent students from downloading it
3. Videos embedded from Vimeo do not take up any quota space in your Blackboard course, no matter how long the video is.
Here's how to embed a Vimeo.com video in your Blackboard course:
Direct link to video: http://screencast.com/t/YTdmNDU4Z
(this video has audio, please adjust your sound settings)
1. You can post much longer videos using files that may normally be too large to upload to Blackboard successfully.
2. You can password protect your video and prevent students from downloading it
3. Videos embedded from Vimeo do not take up any quota space in your Blackboard course, no matter how long the video is.
Here's how to embed a Vimeo.com video in your Blackboard course:
[Update: This video below shows Blackboard version 7.x. You can embed videos in an almost identical way in Blackboard version 9.x as well. Just use Edit Mode=ON, and add an item to the course using the "Build Content" button. Then switching to HTML mode as shown in the video is exactly the same. Here's a video example of the process in Blackboard 9.1: http://j.mp/bbx4Ds]
Direct link to video: http://screencast.com/t/YTdmNDU4Z
(this video has audio, please adjust your sound settings)
Friday, December 11, 2009
How to Prevent Students from Printing Blackboard Documents (Using PDF)
Note: there isn't a 100% reliable way to prevent determined students from printing something you post on any website (the Blackboard site is no different). It is always possible for a student to use a screen-copier to copy what is displayed on the screen and then print it, or even to take a picture of the screen with a digital camera and then print it. However...
It is possible to create a PDF file that has a restriction on printing, which will stop the majority of students from being able to print, and will stop the casual user from being able to print. After you create a print-restricted PDF, you post it on Blackboard as you would any other file.
Here are two ways to create a PDF that is print-restricted:
1. Use PDFCreator
We hope this information is helpful.
It is possible to create a PDF file that has a restriction on printing, which will stop the majority of students from being able to print, and will stop the casual user from being able to print. After you create a print-restricted PDF, you post it on Blackboard as you would any other file.
Here are two ways to create a PDF that is print-restricted:
1. Use PDFCreator
- Download and install PDFCreator.
- Set the PDFCreator to restrict printing on documents you create.
- Print your file to the PDFCreator printer to create the restricted PDF file.
- Post the file to Blackboard.
or,
- Start Adobe Acrobat.
- Use Acrobat to create a PDF file with the "no-print" security restriction.
- Post the print-restricted PDF file to Blackboard.
We hope this information is helpful.
Tuesday, November 10, 2009
How to create a sign-up sheet in Blackboard
This article shows how to create a sign-up sheet using a Wiki in Blackboard. Please also see this article about the alternative of creating a sign-up sheet using the "Sign Up" tool in Blackboard.
An instructor may want to create a sign-up sheet to allow students to sign-up for office-hour slots, or to sign up for topics for an assignment, or for meetings with an advisor or conference seats, etc.
The best way to accomplish this is to add a Wiki to your course. A Wiki is a page or set of pages that can be viewed and edited/filled-out by students.
Create a sign-up sheet on the first page of the Wiki with visible slots that the students can sign up for. The students can then come and sign their names in the slots by editing the Wiki page.
Example of the content of the Wiki:
Here are instructions for how to set up a Wiki. You will want to create a page that all students in the course have access to edit and name it "Sign up sheet" or something similar:
http://blackboardtips.blogspot.com/2007/09/how-to-add-wiki-to-your-blackboard.html
For more information on how to use Wikis in Blackboard courses, please contact the Edtech Center at 617.373.3157
The best way to accomplish this is to add a Wiki to your course. A Wiki is a page or set of pages that can be viewed and edited/filled-out by students.
Create a sign-up sheet on the first page of the Wiki with visible slots that the students can sign up for. The students can then come and sign their names in the slots by editing the Wiki page.
Example of the content of the Wiki:
Sign up for Office Hours on this page. To sign up, select “edit” on the right, and add your name to only one slot. Slots are taken on a first-come-first serve basis:
3:00pm _____________________________
4:00pm _____________________________
5:00pm _____________________________
6:00pm _____________________________
Here are instructions for how to set up a Wiki. You will want to create a page that all students in the course have access to edit and name it "Sign up sheet" or something similar:
http://blackboardtips.blogspot.com/2007/09/how-to-add-wiki-to-your-blackboard.html
For more information on how to use Wikis in Blackboard courses, please contact the Edtech Center at 617.373.3157
Tuesday, October 20, 2009
How to take Attendance using Blackboard
This post is outdated and refers to an older version of Blackboard. It remains here for historical record only. For an updated method of taking attendance in Blackboard, see: https://www.ats.neu.edu/qwickly-attendance
To take attendance using Blackboard, create an "Attendance" column in the gradebook for each class session for which you'd like to take attendance.
Link to video: http://screencast.com/t/PvionzpXR
(This video includes audio. Please turn up the sound on your computer)
Tip: As in the video, when you set up the column, leave "make item available to users" set to YES, so students can view their own attendance record in the course. Students are only able to view their own attendance records (not the attendance of others).
To take attendance using Blackboard, create an "Attendance" column in the gradebook for each class session for which you'd like to take attendance.
- Make the maximum point value 1.
- Set the gradebook to display the item as complete/incomplete (instead of as a "score").
- Set the column not to be included in the grade total calculations.
- Click the column heading in the Gradebook, then click "Item Grade List".
- Give each student who attends class a "1". Leave absentees blank.
Link to video: http://screencast.com/t/PvionzpXR
(This video includes audio. Please turn up the sound on your computer)
Tip: As in the video, when you set up the column, leave "make item available to users" set to YES, so students can view their own attendance record in the course. Students are only able to view their own attendance records (not the attendance of others).
Monday, October 12, 2009
In Internet Explorer, do not use "Compatibility View" for Blackboard
UPDATE: Blackboard no longer recommends using Compatibility View for the Blackboard site. Instead, please make sure Compatibility View is turned OFF for the Blackboard site as follows:
http://blackboardtips.blogspot.com/2013/12/turn-off-compatibility-mode-in-internet.html
More information from Microsoft on IE8 Compatibility View: http://bit.ly/ie8compatibility
http://blackboardtips.blogspot.com/2013/12/turn-off-compatibility-mode-in-internet.html
More information from Microsoft on IE8 Compatibility View: http://bit.ly/ie8compatibility
Thursday, September 03, 2009
Add myFiles links To Your Blackboard Course
The best way to post large files in your course in Blackboard is to take advantage of our myFiles service. This has several advantages including faster download of files from campus, automatic update of files in Blackboard when they are updated in myFiles, and myFiles links will not take up any quota in your Blackboard course.
Here's the easy way to add myFiles links to your Blackboard course:
1. First toggle Edit Mode at the upper right of your course to "on"

2. Click a content area in your course menu on the left in which you would like to add the myFiles link, such as the "Course Materials" section.
3. Choose "Add myFiles Links" from the "Add Interactive Tool" button.


5. Click OK. You're done.
Blackboard will take care of making sure that the students in your course have access to the files in myFiles by setting up "ticketing" in myfiles to allow for access.
Here's a video tutorial demonstrating how to add myFiles links to Blackboard. Note, this video is a bit outdated (it is for the old Blackboard version 7), but the concept is the same. Follow exact directions above.
(both video and audio, so make sure your sound is enabled)
(Link to video: http://screencast.com/t/dgE2EdFGpI)
Here's the easy way to add myFiles links to your Blackboard course:
1. First toggle Edit Mode at the upper right of your course to "on"
2. Click a content area in your course menu on the left in which you would like to add the myFiles link, such as the "Course Materials" section.
3. Choose "Add myFiles Links" from the "Add Interactive Tool" button.
4. Blackboard will display the files and folders in myFiles. Check the boxes next to the files you want to add links to. You can even check an entire folder to add links to all the files. Click the "Make Links" button to make the links in Blackboard.

5. Click OK. You're done.
Blackboard will take care of making sure that the students in your course have access to the files in myFiles by setting up "ticketing" in myfiles to allow for access.
Here's a video tutorial demonstrating how to add myFiles links to Blackboard. Note, this video is a bit outdated (it is for the old Blackboard version 7), but the concept is the same. Follow exact directions above.
(both video and audio, so make sure your sound is enabled)
(Link to video: http://screencast.com/t/dgE2EdFGpI)
Monday, August 03, 2009
Blackboard Video Tutorials
We have an assortment of video tutorials to help you get familiar with parts of the Blackboard system you may not have used before, or to help shore up your knowledge of a feature which you may have tried.
Check out the video tutorials here:

www.ats.neu.edu/blackboard/tutorials
Check out the video tutorials here:
www.ats.neu.edu/blackboard/tutorials
Friday, June 19, 2009
Wednesday, February 18, 2009
How to minimize and maximize modules on the Home tab of Blackboard
It is possible to collapse and re-open modules (boxes) on the Home tab of Blackboard such as the "My Courses" module by clicking the small box-shaped icon at the upper-right (next to the pencil-shaped icon):

Here is a video demonstrating how to collapse and maximize a module:
We hope this information is helpful.

Here is a video demonstrating how to collapse and maximize a module:
We hope this information is helpful.
Saturday, January 24, 2009
Guidelines for posting Multimedia files to Blackboard
Here are some recommendations that can help in making your multimedia files easier for students to download and view in Blackboard.
Multimedia Guidelines
In an effort to maximize access to dynamic media content (images, video, audio, and Flash files) by students, we recommend that instructors posting multimedia files to a web page or Blackboard course adhere to these file size guidelines.
The diversity of internet connection types among students makes it important to pay attention to the size of files when uploading content. For example, a student using a broadband connection would be able to download a 10MB file in approximately 1 minute or less, whereas a student using a 56K modem connection (there still are some out there) would spend about 30 minutes downloading the same file.
Images
Most images should only be around 60k-100k; however, larger sizes are acceptable when larger files are required (e.g., graphic design courses); in such special cases, the image size should be 500k or less. The best image formats are JPEG (.jpg) and GIF (.gif)
PowerPoint
PowerPoint slide shows can be added to a Blackboard site but should be limited to 10 mb. Care should be taken to compress all contained images (to keep file size small). In addition, PPT should be provided in an alternative format, such as PDF. When creating PDF files, it is recommended that the print setting be set for 3 slides per page. This will reduce the number of pages, should a student wish to print the PDF document. The best PowerPoint format is PowerPoint 97-2003 (.PPT) rather than the newer PowerPoint 2007 (.PPTX) format, which might require students using older versions of Microsoft Office to download a special viewer.
Another option for Slide Shows is to upload your file to the online streaming slide show service Slide Share. You can use the service to add more features to your slide show, such as audio, music, narration, and then embed it in your Blackboard course site using Slide Share's embedding feature.
Video
Please see this related article on how to embed video in Blackboard.
Video can be very tricky; it is very easy to create a video file that is too large to be delivered on the web. Consider that your students may not have access to a broadband connection. Some students are still on dial-up connections, making it impossible to access large video files uploaded to Blackboard.
These are the most acceptable video formats: Quicktime (.MOV), Windows Media Video (.WMV), MPEG-4 (.MP4), Flash Video (. SWF or .FLV), and RealMedia (.RM).
Audio-Video Interleave (.AVI) container file format may also work, but is not recommended, as it is not optimized for the web, and can require "codec" software to view that students may need to download separately (such as the Divx codec and others). Certain newer formats, such as MKV (.mkv) will almost always require the students to download a separate viewer program to watch.
You can also put your video on Blackboard by uploading it to a streaming video site and then "embedding" the video right in your Blackboard course site. It is always better to stream the video from sites such as YouTube, Vimeo, or Picasaweb than to upload the file just to Blackboard. If you choose to upload a video files directly into Blackboard, that file should be no larger than 100MB. Larger files should be uploaded to a streaming video site and then embedded in Blackboard (this makes them appear to be contained in Blackboard, but they are actually streamed from the streaming video site).
Audio
Audio files uploaded to Blackboard should be no larger than 5MB. Acceptable formats are .MP3, .M4A, .M4B, .AAC, and .WMA. The best way to post an audio file to Blackboard is to make it a Podcast episode - that way the player for the audio is shown right in Blackboard and the student does not have to download the audio before listening to it.
Note: .WAV is a legacy format for which the file size is too large and is therefore not recommended.
Flash
For Flash files (.SWF), size is not typically an issue. Flash is intended for web delivery, and takes download time into consideration. Flash file size should be less than 5MB.
Tuesday, September 02, 2008
Google's Chrome Browser and Blackboard
Google has developed a browser known as Chrome.
Tests of the Blackboard using the Chrome browser have been largely encouraging, with many functions on the site working perceivably faster than is typical with Internet Explorer and even Firefox.

However we have not had time to fully test and vet the Blackboard application in Chrome. Please let us know if you find additional issues beyond the ones described here.
Known issues with Blackboard on Chrome:
1. Blackboard Grade Center final column missing bug: in Blackboard version 9.1.x, when viewing the Grade Center using the Chrome Browser's 90% zoom setting or lower, the right-most column may disappear. This problem can be corrected by changing the zoom value back to 100% and/or changing the width of the Chrome browser window.
2. The Quicktime plugin sometimes crashes in Chrome. If you have a lot of video content (e.g. .mp4 files) posted in your course, you may have better luck accessing them with Firefox than with Chrome.
Please send any comments or issues you discover to ats@neu.edu
Thank you for using Blackboard at Northeastern University!
Tests of the Blackboard using the Chrome browser have been largely encouraging, with many functions on the site working perceivably faster than is typical with Internet Explorer and even Firefox.
However we have not had time to fully test and vet the Blackboard application in Chrome. Please let us know if you find additional issues beyond the ones described here.
Known issues with Blackboard on Chrome:
1. Blackboard Grade Center final column missing bug: in Blackboard version 9.1.x, when viewing the Grade Center using the Chrome Browser's 90% zoom setting or lower, the right-most column may disappear. This problem can be corrected by changing the zoom value back to 100% and/or changing the width of the Chrome browser window.
2. The Quicktime plugin sometimes crashes in Chrome. If you have a lot of video content (e.g. .mp4 files) posted in your course, you may have better luck accessing them with Firefox than with Chrome.
Please send any comments or issues you discover to ats@neu.edu
Thank you for using Blackboard at Northeastern University!
Saturday, June 21, 2008
How to add Blackboard to Facebook
Update: Classtop has discontinued support for the CourseFeed application, so the method in this article no longer works. The article will remain posted for historical record.
______
Information Technology Services at Northeastern University has partnered with ClassTop (developer of the CourseFeed application) to offer a new secure Blackboard / Facebook integration. You can now add your Blackboard courses to your Facebook account in a way that will not compromise your myNEU account credentials.
Some of the benefits of Blackboard on Facebook:
If you have received an invitation to the CourseFeed Facebook application from one of your classmates, you may follow the steps in the invitation to add the CourseFeed application to Facebook. If you have not received an invitation, here is how to add Blackboard to Facebook:
1. Log into Northeastern University's Blackboard site on myNEU or at blackboard.neu.edu
2. In Blackboard, under the Home tab, click the "Facebook" link on the left (this link will be available starting July 8th, 2008):

3. Follow the steps on the screen to add the CourseFeed application to Facebook

To add your courses, you must be a member of the Northeastern network in Facebook

For more information on the CourseFeed application in Facebook, see: http://www.coursefeed.com/faq.html
______
Information Technology Services at Northeastern University has partnered with ClassTop (developer of the CourseFeed application) to offer a new secure Blackboard / Facebook integration. You can now add your Blackboard courses to your Facebook account in a way that will not compromise your myNEU account credentials.
Some of the benefits of Blackboard on Facebook:
- Automatic notifications for new items added to your Blackboard courses
- A Facebook "Wall" for your course where you can post messages to your classmates
- Announcements from Blackboard delivered directly to Facebook
If you have received an invitation to the CourseFeed Facebook application from one of your classmates, you may follow the steps in the invitation to add the CourseFeed application to Facebook. If you have not received an invitation, here is how to add Blackboard to Facebook:
1. Log into Northeastern University's Blackboard site on myNEU or at blackboard.neu.edu
2. In Blackboard, under the Home tab, click the "Facebook" link on the left (this link will be available starting July 8th, 2008):

3. Follow the steps on the screen to add the CourseFeed application to Facebook

To add your courses, you must be a member of the Northeastern network in Facebook

For more information on the CourseFeed application in Facebook, see: http://www.coursefeed.com/faq.html
Tuesday, February 19, 2008
Instructor Manual for Blackboard 7
We apologize, the manual link from the Control Panel in Blackboard is not currently working.
The Instructor Manual for Blackboard version 7 is available here.
The Instructor Manual for Blackboard version 7 is available here.
Wednesday, December 05, 2007
How to Download your Blackboard Grade Center
You may download the Grade Center so you will have an offline copy to view and manipulate in Microsoft Excel or similar program. We recommend downloading your Blackboard Grade Center occasionally so that you will have a local backup copy.
Here's how to download the Grade Center:
1. In your course, click Grade Center > Full Grade Center

2. Click the "Work Offline" button > Download
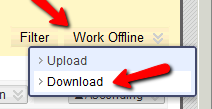
3. Leave the defaults as they are and click the "Submit" button
(Screenshot: http://screencast.com/t/n3EyA8Qc4x)
3. Leave the defaults as they are and click the "Submit" button
(Screenshot: http://screencast.com/t/n3EyA8Qc4x)
4. Click the Download button. This will tell your browser to download the file.

5. Note where you are saving the file on your computer, and click the Save button.After your browser downloads the Grade Center file, you may open the file for viewing on your computer using Excel or a similar spreadsheet program, or the text editor of your choice.
If you make changes to the values in the spreadsheet, you may upload it back to the Blackboard Grade Center as well. See Uploading Grades to the Grade Center from a File.
If you make changes to the values in the spreadsheet, you may upload it back to the Blackboard Grade Center as well. See Uploading Grades to the Grade Center from a File.
Wednesday, October 17, 2007
How to Upload a Document to the Discussion Board
Step 1 - Open the Discussion Board
Access the Discussion Board by clicking on the Discussion Board link located in the navigation pane on the left side of screen in your Blackboard course.

Step 2 - Upload your Document
Click on the title of the Discussion to open it

Click on Add New Thread

Enter a Subject and a Message (description) for your post.

Scroll down and click on the Browse button.

Browse to your file by selecting the Destination.

Next, select your document by clicking on it

Click Open.

Click Submit

If you have successfully uploaded a document to the Discussion Board, you will see a paper clip icon next to the subject of your post.

Access the Discussion Board by clicking on the Discussion Board link located in the navigation pane on the left side of screen in your Blackboard course.
Step 2 - Upload your Document
Click on the title of the Discussion to open it
Click on Add New Thread
Enter a Subject and a Message (description) for your post.
Scroll down and click on the Browse button.
Browse to your file by selecting the Destination.
Next, select your document by clicking on it
Click Open.
Click Submit
If you have successfully uploaded a document to the Discussion Board, you will see a paper clip icon next to the subject of your post.
Friday, October 12, 2007
Version of Java for Chat and Virtual Classroom in Blackboard
If you're using the Chat or Virtual Classroom options in the Collaboration section of Blackboard, we recommend version 5.0 of the Java plugin for your browser for both students and instructors. Newer versions (such as version 6.x) have been known to cause problems with collaboration sessions.
You can download the version 5.0 of the Java plugin for Windows here:
http://www.ats.neu.edu/blackboard/java/jre-1_5_0_12-windows-i586-p.exe
(for Macintosh, please use the built-in java capability of your browser)
You can download the version 5.0 of the Java plugin for Windows here:
http://www.ats.neu.edu/blackboard/java/jre-1_5_0_12-windows-i586-p.exe
(for Macintosh, please use the built-in java capability of your browser)
Tuesday, September 25, 2007
How to add a Wiki to your Blackboard course
Wikis are shared web spaces (web pages) that students and instructors can post material to and edit together collaboratively.
As the instructor, you can decide who in your class is allowed to edit and add content to a Wiki, and which participants in the class are allowed to view the wiki. You can use a Wiki to have students collaborate on a document, do a team project, produce a group report, or any other exercise in working together.
Here is how to add a Wiki to your course site in Blackboard:
Step 1 - Choose a content area
First toggle Edit Mode at the upper right of your course to "on"
Click a content area in your course menu on the left in which you would like the Wiki to appear (you could choose "Course Material" or "Documents" for example).
Step 2 - Add the Wiki
Use the "Add Interactive Tool" button and click on "Campus Pack Wiki".

Choose "new" Wiki and click the Submit button.
Give your Wiki a title and choose grading options:

Step 3 - Add a page to the Wiki
Use the "Add New Page" button to add the first page to the Wiki. Use the "Permissions" settings at the top to decide which of your students or groups will have access to the Wiki to edit and/or view.

Step 4 - How students can edit the Wiki
The Wiki will appear in your course under the section you chose in step 1. View or edit the Wiki, students click the View link

If they have permission, students can edit the current page of the Wiki by clicking "edit" on the right side of the page. They can add a new page to the Wiki by clicking "Add New Page".
Here is how to add a Wiki to your course site in Blackboard:
Step 1 - Choose a content area
First toggle Edit Mode at the upper right of your course to "on"
Click a content area in your course menu on the left in which you would like the Wiki to appear (you could choose "Course Material" or "Documents" for example).
Step 2 - Add the Wiki
Use the "Add Interactive Tool" button and click on "Campus Pack Wiki".
Choose "new" Wiki and click the Submit button.
Give your Wiki a title and choose grading options:

Step 3 - Add a page to the Wiki
Use the "Add New Page" button to add the first page to the Wiki. Use the "Permissions" settings at the top to decide which of your students or groups will have access to the Wiki to edit and/or view.

Step 4 - How students can edit the Wiki
The Wiki will appear in your course under the section you chose in step 1. View or edit the Wiki, students click the View link
If they have permission, students can edit the current page of the Wiki by clicking "edit" on the right side of the page. They can add a new page to the Wiki by clicking "Add New Page".
That's all there is to it. Your Wiki is now ready to use.
Tuesday, August 28, 2007
How to add a Blog to your Blackboard course
Blogs are journal-like web spaces that students can post material to. As the instructor, you can decide who in your class is allowed to post content to a blog, and who is allowed to read the blog. You can use a Blog to have students post a journal, upload files, upload homework, text, pictures, or even sound files.
Here is how to add a Blog to your course site in Blackboard:
Step 1 - Choose a content area
First toggle Edit Mode at the upper right of your course to "on"
Click a content area in your course menu on the left in which you would like the Wiki to appear (you could choose "Course Material" or "Documents" for example).
Step 2 - Add the Blog
Use the "Add Interactive Tool" button and click on "Campus Pack Blog":

Choose "new" Blog and click the Submit button.
Give your Blog a title and choose grading options:

Step 3 - Add an Entry to the Blog
Use the "Add New Entry" button to add the first entry to the Blog. Use the "Permissions" settings at the top to decide which of your students or groups will have access to the Blog to make entries and view it.

Step 4 - How students can access the Blog
The Blog will appear in your course under the section you chose in step 1. To view or add entries to the Blog, students click the View link
If they have permission, students can add entries to the Blog by clicking "Add New Entry" on the right side of the page.
Here is how to add a Blog to your course site in Blackboard:
Step 1 - Choose a content area
First toggle Edit Mode at the upper right of your course to "on"
Click a content area in your course menu on the left in which you would like the Wiki to appear (you could choose "Course Material" or "Documents" for example).
Step 2 - Add the Blog
Use the "Add Interactive Tool" button and click on "Campus Pack Blog":
Choose "new" Blog and click the Submit button.
Give your Blog a title and choose grading options:

Step 3 - Add an Entry to the Blog
Use the "Add New Entry" button to add the first entry to the Blog. Use the "Permissions" settings at the top to decide which of your students or groups will have access to the Blog to make entries and view it.

Step 4 - How students can access the Blog
The Blog will appear in your course under the section you chose in step 1. To view or add entries to the Blog, students click the View link

If they have permission, students can add entries to the Blog by clicking "Add New Entry" on the right side of the page.
That's all there is to it. Your Blog is now ready to use.
Friday, August 24, 2007
How to Clean Up/Edit Your Course List in Blackboard
If you've had many courses in the past, you may have a large list of courses in the My Courses module on the front page of Blackboard.
Here is a quick way to reduce the clutter and make it easier for you to find current courses more quickly:
1. Log in to Blackboard.
2. On the Home tab, you will find the "My Courses" module.
Hover your mouse at the upper-right corner of the module, and click on the gear-shaped icon that appears.

3. The Customize My Courses screen appears. You will notice a list of your courses with a series of check boxes to the right of each.
4. Uncheck the boxes in the "Select All" column for the courses you want to remove.

5. Click Submit when you are done.
If you prefer to have all your courses listed in the My Courses module, but need an easy way to distinguish between courses by term, check the box in Display Course ID column. When you go back to the My Courses module you will see the Course ID listed next to the name. The Course ID includes a four (4) character suffix that designates its semester and year (e.g. fl09 = Fall 2009, sp08 = Spring 2008).
If you ever need to see a list of all your courses (e.g., you need the Course ID when requesting a new course), you can always see this by clicking on the Courses tab at the top of the screen. Here you will see a complete list of your courses.
How to completely remove your course from Blackboard
If you want to remove (archive) your course from the site completely, fill out the following form:
-> http://www.ats.neu.edu/blackboard/requests/delete
Your course will be deleted (archived). If you wish to have it restored at a later time, send a request to help@neu.edu.
Here is a quick way to reduce the clutter and make it easier for you to find current courses more quickly:
1. Log in to Blackboard.
2. On the Home tab, you will find the "My Courses" module.
Hover your mouse at the upper-right corner of the module, and click on the gear-shaped icon that appears.
3. The Customize My Courses screen appears. You will notice a list of your courses with a series of check boxes to the right of each.
4. Uncheck the boxes in the "Select All" column for the courses you want to remove.
5. Click Submit when you are done.
If you prefer to have all your courses listed in the My Courses module, but need an easy way to distinguish between courses by term, check the box in Display Course ID column. When you go back to the My Courses module you will see the Course ID listed next to the name. The Course ID includes a four (4) character suffix that designates its semester and year (e.g. fl09 = Fall 2009, sp08 = Spring 2008).
If you ever need to see a list of all your courses (e.g., you need the Course ID when requesting a new course), you can always see this by clicking on the Courses tab at the top of the screen. Here you will see a complete list of your courses.
How to completely remove your course from Blackboard
If you want to remove (archive) your course from the site completely, fill out the following form:
-> http://www.ats.neu.edu/blackboard/requests/delete
Your course will be deleted (archived). If you wish to have it restored at a later time, send a request to help@neu.edu.
Wednesday, July 25, 2007
How to download many files at once from Blackboard
If you are using the Firefox browser, there is a solution which will allow you or your students to download all the files in a Blackboard folder at once (without requiring access to the Blackboard Control Panel)
Instructors often post many files in folders in their Blackboard courses. For students, the usual way of downloading these files is by clicking the links one at a time. To speed up this process, there is a plug-in for the Firefox browser called "DownThemAll!" that will go through all the links on a page, let you check the ones you want, and download all of them at once.
This plugin works well with Blackboard.
Using your Firefox browser, get the plug-in here:
-> https://addons.mozilla.org/en-US/firefox/addon/201
Here is a picture of "DownThemAll!" in use:

Note: For the Blackboard site, we recommend setting DownThemAll to download each file sequentially. Do to so, in Firefox, go to Tools > DownThemAll > Preferences and set "Max contemporary downloads" to 1. (Thanks to Colin for this tip)
For more instructions on how to use "DownThemAll!" see the developer's website here:
http://www.downthemall.net/howto/features
Instructors often post many files in folders in their Blackboard courses. For students, the usual way of downloading these files is by clicking the links one at a time. To speed up this process, there is a plug-in for the Firefox browser called "DownThemAll!" that will go through all the links on a page, let you check the ones you want, and download all of them at once.
This plugin works well with Blackboard.
Using your Firefox browser, get the plug-in here:
-> https://addons.mozilla.org/en-US/firefox/addon/201
Here is a picture of "DownThemAll!" in use:
Note: For the Blackboard site, we recommend setting DownThemAll to download each file sequentially. Do to so, in Firefox, go to Tools > DownThemAll > Preferences and set "Max contemporary downloads" to 1. (Thanks to Colin for this tip)
For more instructions on how to use "DownThemAll!" see the developer's website here:
http://www.downthemall.net/howto/features
Wednesday, May 09, 2007
How to configure Blackboard and Internet Explorer 7 for Windows Vista
Blackboard recommends these steps to enable Blackboard to run under Internet Explorer 7 in Windows Vista:
Set blackboard.neu.edu as a "trusted site" in Internet Explorer as follows:
1. Open Internet Explorer 7
2. If the menus do not appear at the top, press and release the ALT key on the keyboard to display them
3. Select Tools menu / Internet Options
4. Under the Security tab, click Trusted Sites and then the Sites button
5. Uncheck the "Require server verification" checkbox if it is checked
6. Type "http://blackboard.neu.edu" in the "add this website" box and click the Add button
7. Click Close and OK
Set the Visual Text Box Editor to Unavailable in Blackboard as follows:
1. Log into Blackboard at http://blackboard.neu.edu
2. Click the "Personal Information" link directly below the Home tab in Blackboard
3. Click the "Set Visual Text Box Editor Options" link
4. Click Unavailable
5. Click the Submit button on the lower right
The plaintext text box should now function under Vista.
Monday, April 23, 2007
How to Create a Turnitin Assignment
Creating a Turnitin Assignment is as easy as creating a regular Assignment in Blackboard. Turnitin Assignments have the advantage of automatic plagiarism detection. They accept a limited set of text-based file types from students (see File Types note below).
Here are the steps to add a Turnitin Assignment to your Blackboard course:
1. In your course, toggle Edit Mode at the top right to "On".

2. Click the area on the left side in the course menu into which you want to post the Turnitin Assignment (e.g. the "Assignments" section)

3. Select "Turnitin Assignment" from the "Assessments" button:

4. Select the assignment type. The most common is "Paper Assignment", for which the students can submit a paper.

5. Set the assignment title, point value, and start/due dates options for your assignment. The "post date" is the date that grades and comments are available to students in the "Grademark" feature and should be set for a date later than the due date. Click the Submit button at the top to post the assignment:

6. Click Submit, and OK.
Student Access
Students can access your assignment by going to the content area in which you posted the assignment and clicking the "View /Complete" link:

Instructor Access
You can collect the students submitted work and view their papers and plagiarism reports by going to the Course Tools > Turnitin Assignments link in your Control Panel. You can also access the papers via the entries in Control Panel > Grade Center > Full Grade Center

(1) Video showing how to add a Turnitin Assignment to your course: http://j.mp/neu-bb-create-turnitin-assignment-video
1. In your course, toggle Edit Mode at the top right to "On".
2. Click the area on the left side in the course menu into which you want to post the Turnitin Assignment (e.g. the "Assignments" section)

3. Select "Turnitin Assignment" from the "Assessments" button:
4. Select the assignment type. The most common is "Paper Assignment", for which the students can submit a paper.

5. Set the assignment title, point value, and start/due dates options for your assignment. The "post date" is the date that grades and comments are available to students in the "Grademark" feature and should be set for a date later than the due date. Click the Submit button at the top to post the assignment:

6. Click Submit, and OK.
Student Access
Students can access your assignment by going to the content area in which you posted the assignment and clicking the "View /Complete" link:
Instructor Access
You can collect the students submitted work and view their papers and plagiarism reports by going to the Course Tools > Turnitin Assignments link in your Control Panel. You can also access the papers via the entries in Control Panel > Grade Center > Full Grade Center
More Turnitin Resources / Tutorials for instructors:
(1) Video showing how to add a Turnitin Assignment to your course: http://j.mp/neu-bb-create-turnitin-assignment-video
(2) Video Tutorial: how to check for plagiarism by viewing an Originality Report: http://www.youtube.com/watch?v=wUrTo-0RoHM&hd=1
(3) Video Tutorial: how to use Grademark: http://www.youtube.com/watch?v=r9_mmowfEDo&hd=1
(4) Video Tutorial: how to use Peermark: http://www.youtube.com/watch?v=N8sDMaGfw9I&hd=1
.
Thursday, March 15, 2007
What's New in Blackboard version 7
Version 7 contains everything you are familiar with from previous versions of Blackboard, with select new enhancements. Please see links below for tutorials and demonstrations of the new features!
- Completely new Discussion Board
- Adaptive Release improvements
- Review Status improvements
- Built-in Syllabus Builder
- Performance Dashboard improvements
- New Advanced Assessment Questions
- Download Assessment Attempts that Include All Questions
- Randomized Multiple Choice Answers
- Advanced Course Menu and New Course Map
- Changes to Import, Export, Archive and Restore Functionality
- Course Copy changes for Course Cartridges
- Additional Course Content Types - Wikis, Blogs, Podcasts
- Additional Tutorials
Multi-Language Support by Institution, Course and User
Institutions can run multiple languages (or locales) on the same system. Institutions can offer the Blackboard Academic Suite in Spanish, French, Italian, German, Dutch, and Portuguese. The entire system can be set in a specific language, or a language may be offered as a preference for users. To support cross-border education, as well as foreign language courses, Instructors can set the language of the course independently from the language setting of the overall system.
New Discussion Board
Adaptive Release
Course content does not always apply to all users in the course. Using Adaptive Release, Instructors can display content to certain users for a limited period of time, or only after users meet (or fail to meet) predetermined requirements. Some content might be applicable to all users in the course, while other content should be audience-specific.
Adaptive Release allows an Instructor to create custom learning paths through course content and activities. Content items, discussions, assessments, assignments, or other activities can be released to Students based on a set of criteria including: date and time, specific users, group membership, grades or attempts on a particular test or assignment, or Review Status of another item in the course. Instructors create and modifiy Adaptive Release rules from the new Manage page available on all content items.
Click for tutorial
Syllabus Builder
The Syllabus Builder is an easy-to-use content item that makes Syllabus creation—the most basic element of any course—simple for Instructors of all levels, with a feature that allows them to easily apply designs to their work. Syllabi can contain general class information such as dates and times as well as an overview of each lesson.
Instructors create a syllabus by selecting Syllabus from the action bar dropdown menu on a Content Area page.
Performance Dashboard
The Performance Dashboard is a course tool that allows Instructors to see key information and outcomes for all course users. It displays the last time users logged in, their course role, content availability by user based on Adaptive Release criteria, Review Status for content items, and a direct link to the Gradebook: User Grade List page for individual users.
Advanced Assessment Questions
When creating Assessments in the Blackboard Learning System, Instructors may choose from ten additional question types, including: Calculated Questions, Numeric Response Questions, File Response Questions, Hot Spot Questions, Multiple Fill-in-the-Blank Questions, Jumbled Sentence Questions, Opinion Scale Questions, Short Response Questions, Either / Or Questions, and Quiz Bowl Questions.
Download Assessment Attempts that Include All Questions
Instructors can download Survey or Test attempts as a .CSV file. Most often, this feature is used to perform statistical analysis in a spreadsheet application, such as Microsoft Excel. Downloaded Assessment attempts now include all questions in the Assessment. In earlier versions, only certain question types, such as Multiple Choice, were included in the downloaded attempt.
Randomize Multiple Choice Answers
Instructors have the option to randomize the answers in multiple choice questions. The answers are randomized for each assessment attempt, which helps prevent Student cheating.
Advanced Course Menu and New Course Map
Two views of the Course Menu are now available to users: the Quick View (the original menu design) and the Detail View. The Detail View is the full Course Map, letting users expand and collapse the Course Menu, and displays a clickable link to each item in the course. If allowed by the Instructor, users may toggle between these two views.
In addition, commonly used tools are separated from the Course Menu to make them easier to find and use. To support the advanced Course Menu, the Course Map has been redesigned. It displays new icons based on the item or tool, shows only the content available to the current user (based on Adaptive Release critieria), and loads very quickly even in large, content-rich courses. The map is cached for even faster rendering in subsequent views and has a 20 minute automatic refresh.
Changes to Import, Export, Archive and Restore
In Blackboard Academic Suite (Release 7) the import, export, archive and restore processes are asynchronous. This means that users do not have to wait in the browser
window while the operation takes place. This is more efficient for users because the operations are queued and managed in the background. When one of these tasks is executed, the system completes it in the background and sends the user an email upon completion. The new process for Export and Archive matches the process for Course Copy. The new Export / Archive Manager, available on the Control Panel for individual courses and organizations, makes it easier for users to manage these operations. This page lists all of the packages that have been created for the course, including detailed logs
for the package processes. The user can export and archive the course multiple times and keep multiple backups of the course. The user may also remove packages that are no longer needed.
Course Copy changes for Course Cartridges
The Copy Course Materials into a New Course and Copy Course Materials into an Existing Course features now include an option to include protected Course Cartridge content. Instructors and Administrators can choose whether or not they would like to include cartridge content in the copy operation. If this option is selected, the content may be accessed in the copied course by users with a valid Student Access Key. When copying course materials into an existing course, the system will check to confirm that both courses contain the same Course Cartridge. If they do, the selected course
sections will be copied including any protected Course Cartridge content. If the courses contain different Course Cartridges, only non-Cartridge materials will be copied and the user will be given a message stating there was a Course Cartridge conflict.
Additional Course Content Types (Wikis, Blog, Podcasts)
How to add a Blog to your course
How to add a Podcast to your course
Subscribe to:
Posts (Atom)