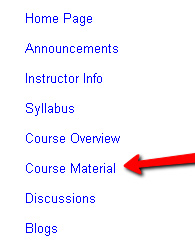
You can embed a Tegrity recording in a small player in any Content Area in your Blackboard course. Here's how:
1. Access the Tegrity recording.
Select the box next to the date of the video you would like to embed.

2. Click on Recording Tasks dropdown menu. Then click on Share Recording.

3. A new window will appear. Uncheck the box Do Not Allow Anonymous Users to View the Recording. This will enable students to view the Tegrity directly from the Blackboard site without having to login to Tegrity again and will provide you with the Embed option.

4. Now you can copy the Embed code by highlighting it with your mouse, then copying it (right-click copy or CTRL+C (Windows) or Command+C (Mac) on the keyboard). Then Click OK.
5. Return to the main page of your Blackboard course and click on the Content Area into which you would like to post your Tegrity recording.
6. Click on Build Content then click Item.

7. From here you can enter the Name of the video and type in a Text description if desired.

8. Next, you will need to access the HTML code editor in order to paste the embed code you copied. To do so, click on the Toggle HTML Source Mode icon in the Text editor toolbar.

9. Make sure that your mouse cursor is flashing a couple of lines below the text you entered. Then paste in the embed code (right-click paste or CTRL+V on keyboard).

10. You can also Attach File, such as an associated transcript of the video or PowerPoint file that the video demonstrates. Select the options Permit Users to View this Content (to set link availability), Track Number of Views (to monitor student viewing of the video), and Select Date and Time Restrictions (to set specific dates for the link to appear).

11 When you are finished setting the options, click Submit.

12. Your new embedded video will appear in your course content area.

13. Done. Now you can see how it looks for students by using the Student View option.
.

No comments:
Post a Comment